
Professional podcasting booths aren’t cheap. People will often rent out recording studios for hundreds or thousands of dollars to record a single episode of a podcast – but the reality is that not all podcasters need to do this.
After all, the beauty of podcasts is that nobody needs to see the recording set-up.
So, if you can make your podcasting booth at home for a fraction of the cost of a professional studio, it’s a fantastic way to save money and still make a good-quality podcast.
However, just a few things to consider, such as soundproofing and ensuring crisp, clear audio quality.
Here are our top DIY podcasting booth ideas!
Closet Conversion:

Transform a small closet into a booth. Line the walls with acoustic foam or blankets to absorb sound. Ensure there’s enough room for your microphone, laptop, and any scripts or notes. The clothing already in the closet can also act as soundproofing!
PVC Pipe Frame Booth:
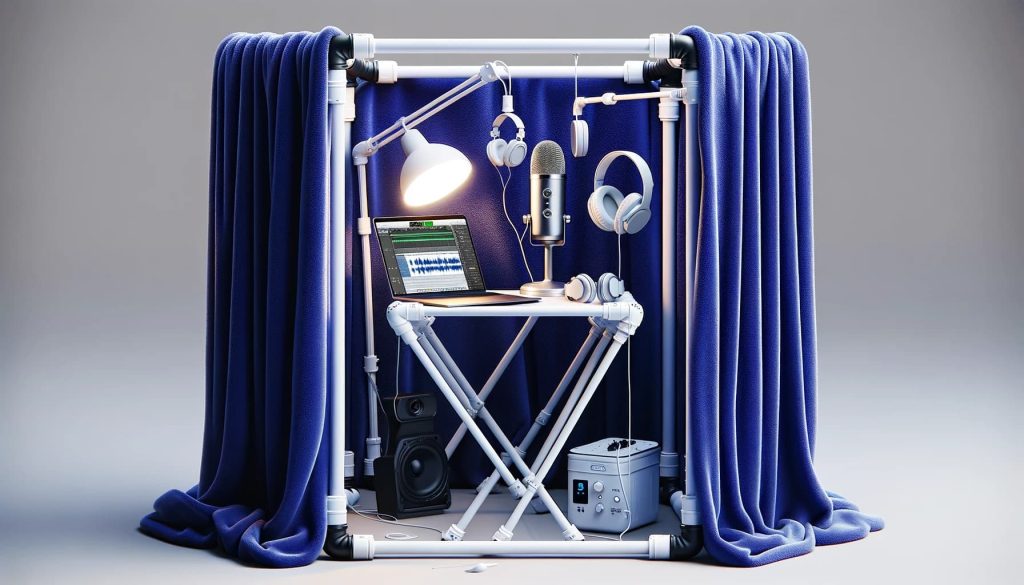
Build a frame using PVC pipes, creating a simple cube or rectangular structure. Hang heavy blankets or moving pads around the frame to create a portable, effective sound barrier. This setup allows flexibility in location and is easy to dismantle.
Bookshelf Barriers
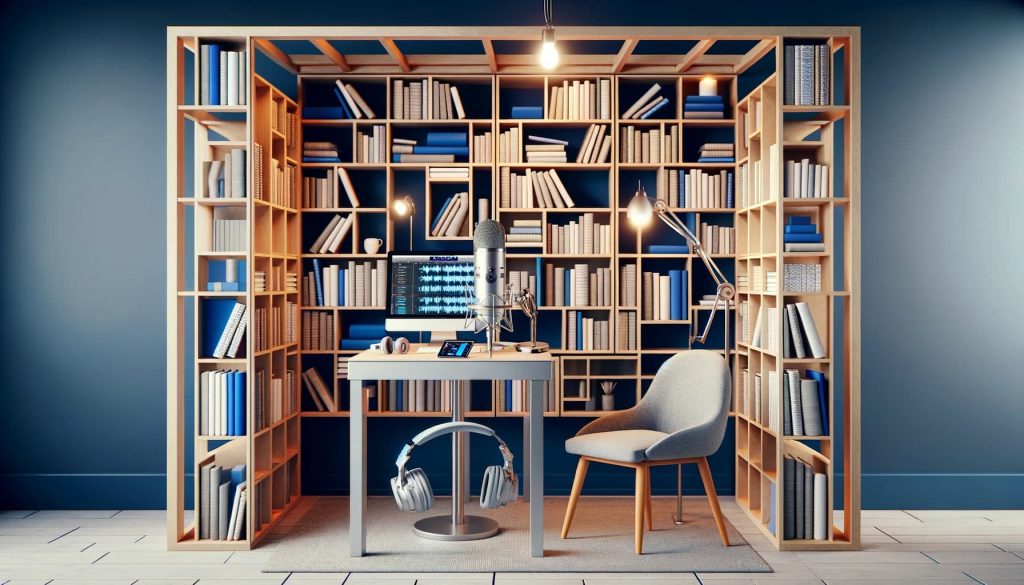
If you have bookshelves, place them around your recording area and fill them with books. Books of different sizes and thicknesses can effectively scatter sound waves, reducing echo. Combine this with a thick rug on the floor and acoustic panels or foam on any remaining exposed wall sections for an improved recording environment.
Mattress Walls:

For a makeshift solution, stand-up mattresses around your recording space. This can be particularly useful for temporary setups or if you’re testing out podcasting and don’t want to invest in permanent solutions.
Acoustic Tiles and Foam:
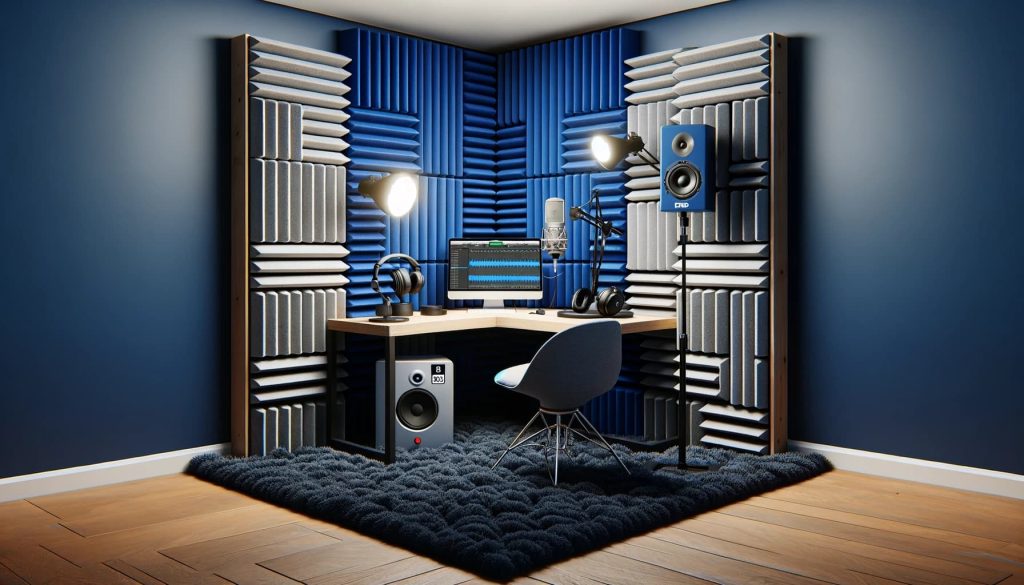
Investing in acoustic foam tiles can be a cost-effective way to improve sound quality. Attach them to the walls around your recording area, focusing on the areas directly in front and to the sides of you, as well as the ceiling, if possible.
DIY Bass Traps:

Low frequencies can be particularly tricky to manage. Make your own bass traps with Rockwool or Owens Corning 703 and place them in the corners of your room to absorb these frequencies.
DIY Podcasting Recording Box
If you’re quite serious about making a good podcast recording booth for your podcast without having to renovate an entire room, then you can build your own recording box with inexpensive items found online.
The key to making a podcast recording booth is soundproofing. Soundproofing the area around the microphone helps to prevent echoes as well as external noises, allowing for clear, crisp audio quality.
So, here’s how to make a recording box!
You will need:
- A cardboard box (one large enough to cover a microphone)
- Acoustic foam panels
- Adhesive spray glue


This recording box is super easy to make. Stick the acoustic foam panels to the inside of the box with adhesive spray glue, ensuring that the open side of the box is left uncovered.
Then, place the box with the open side over the microphone, and you’ve got an affordable makeshift acoustic box!
You also don’t have to use a cardboard box if you don’t have one. Any storage box will do, so you don’t have to worry about gluing the acoustic foam panels if they stay upright.
Blanket Booth
If you need a quick DIY podcasting booth to record a podcast while you’re away from home, you’ll be happy to know you can make a makeshift booth with simply a blanket.
Take a blanket (or sheet, or even a large jacket) and hang it over the microphone and yourself.
While a blanket or sheet will do just fine, you’ll actually get the best noise reduction effects from using a duvet. This is because duvets are thicker than generic bedsheets or blankets, allowing for limited echoing.
You might need to get creative by hanging the blanket off the side of the bed, on the edge of a door, or even like a teepee with a pole, keeping it upright.
All that matters is creating an enclosed space that soundproofs the area around the microphone (also see ‘How to Fix Mic Static‘).
Sure, this isn’t the coolest way to record a podcast (in terms of temperature and appearance!), but it gets the job done – especially when you’re recording in a hotel room or a space where you wouldn’t normally record.
You’ll look silly no matter what, but remember – podcasts are all about the audio, so your listeners won’t need to know about your setup!
The best part about this DIY podcasting booth is that it costs nothing. However, you might need to shift things around to ensure the blanket doesn’t fall on you or the microphone.
It also means you’ll have to get creative with sitting in an awkward position for the duration of the recording!

Use A Small Room
If you’ve got a random small room in the house – whether a walk-in closet or pantry – then you can use the small area to record your podcast!
Of course, these rooms don’t typically have soundproofing materials, so the quality isn’t outstanding if you don’t have acoustic foam panels to stick to the walls.
Still, recording a podcast in a small room is better than recording a podcast in a large room. Just ensure you can record the podcast with the door shut to prevent the sound from leaking and echoing outside the room.
We recommend using a walk-in wardrobe filled with hanging clothes as a makeshift podcasting booth because the clothes should add a nice amount of density to create soundproofing.
If you’re recording in another small room, like a pantry, then try to cover the shelves and objects with blankets to provide some sort of soundproofing.
Converting A Small Room
If you’re looking for a more permanent podcasting booth in your home, you can easily convert a small room into a recording studio.
You only need a small room, such as a walk-in wardrobe, acoustic foam panels, and adhesive spray glue. Avoid using regular adhesive glue, as this can be hard to remove.
Simply clear the area and ensure enough space for your desk, microphone, mixer (see also ‘Best Podcast Mixers‘), and other necessary equipment. Then, cover the walls in acoustic foam panels with adhesive spray, and you’ve got yourself a converted studio space!
The best thing about this DIY podcasting booth method is that it’s fairly inexpensive, does the job, and allows you to be creative. If you’ve got enough room, you can personalize this space with neon lights, monitors, and anything else that makes the area feel more creative.

However, there are a few things to consider when converting a small room. Is there a window that leads to a busy street outside?
Do you have particularly noisy neighbors that share a wall? Is there anything in the room that will make unavoidable noise, like a boiler or air conditioner unit?
While some of these things can be avoided with acoustic padding, it’s still worth considering whether the external noises are worth it.
Conclusion
So, there you have it! You don’t have to spend hundreds of dollars renting a studio or doing a grand conversion of an office room.
There are lots of ways to make your own podcasting booth without going over budget, so even if you’re just using a blanket for soundproofing, then you’ve got yourself a handy booth!


