
If you’re looking to produce high-quality podcasts, learning how to use Audition for podcasting can be a game-changer. Adobe Audition offers professional-level tools that allow podcasters to record, edit, and fine-tune their audio to perfection.
With its advanced features—like multitrack editing and noise reduction—Audition ensures a polished final product. Whether you’re just starting or transitioning from simpler software, this guide will walk you through everything you need to know to elevate your podcast with Adobe Audition.
Key Takeaways
- 🎛️ Professional-Grade Editing: Adobe Audition offers advanced features like multitrack editing, noise reduction, and audio restoration, making it perfect for high-quality podcast production.
- 📚 Learning Curve: While powerful, Audition has a steeper learning curve than free alternatives like Audacity, but Adobe’s resources and tutorials can help you master it.
- 🔌 Flexibility: Audition supports multiple formats, third-party plugins, and direct integration with other Adobe apps, streamlining the editing and exporting process for professional podcasters.
Why Use Adobe Audition for Podcasting?

Adobe Audition stands out as one of the most powerful tools available for podcasters, offering professional-grade audio editing and production capabilities. While many podcasters begin with simpler, free software like Audacity, Audition provides advanced features that make it a favorite for those looking to elevate their production quality. Here’s why:
- Multitrack Recording & Editing: Audition allows you to record multiple tracks simultaneously, making it perfect for podcasts with multiple hosts or guests. This feature gives you the flexibility to edit each audio track separately, ensuring clear, crisp sound for every speaker.
- Advanced Audio Restoration Tools: Whether it’s background noise, clicks, or hums, Audition’s audio restoration tools (like the Spectral Frequency Display and Diagnostics Panel) allow you to clean up recordings with precision, ensuring a professional finish even in less-than-ideal recording environments.
- Creative Cloud Integration: For podcasters who also work with video or graphic elements, Adobe Audition seamlessly integrates with other Adobe Creative Cloud apps like Premiere Pro and Photoshop. This makes it a versatile tool for multimedia projects, streamlining your workflow.
- Customization and Flexibility: From non-destructive editing to batch processing, Audition offers extensive customization options. You can adjust audio levels, apply effects, and even automate complex mixing tasks, making it highly adaptable to any podcast production needs.
- Professional Sound Quality: Audition includes over 70 built-in effects to fine-tune your recordings, such as equalization, noise reduction, and audio restoration. These tools help you meet the high standards of broadcast and streaming platforms.
While Adobe Audition does come with a steeper learning curve and higher price point, its robust feature set makes it a worthwhile investment for serious podcasters who prioritize quality and efficiency.
Setting Up Adobe Audition for Podcasting
Getting Adobe Audition set up for podcast production is the foundation of a smooth workflow. While the software offers numerous advanced features, setting it up correctly ensures that your recordings are of the highest quality. Here’s a step-by-step guide to getting started:
1. Creating a New Session
- Go to File > New > Audio File if you’re recording a single track or File > New > Multitrack Session for multiple tracks.
- Name your session, choose a sample rate of 44100 Hz or higher for podcasting, and set bit depth to 32-bit (float) for professional-grade audio quality.
2. Setting Up the Workspace
- Toggle between Waveform (destructive) and Multitrack (non-destructive) modes. Multitrack is usually better for podcasting, as it allows you to make edits without affecting the original file.
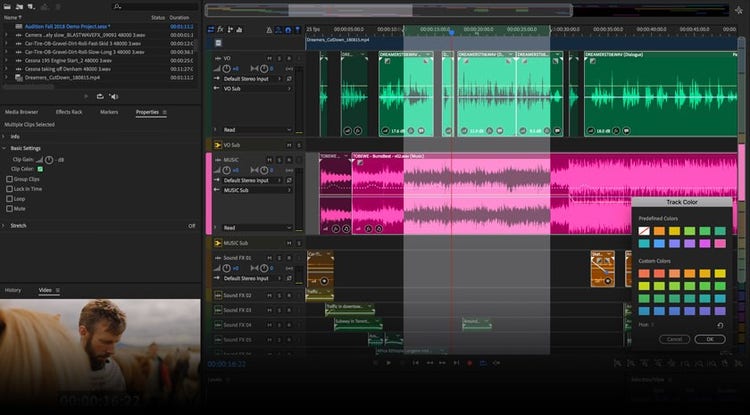
- Color code your tracks to keep them organized. For example, you might use one color for host audio, another for background music, and a third for sound effects.
3. Recording Audio
- Choose your input device (like a USB microphone or audio interface) in the Inputs/Outputs section and arm the track for recording by clicking the “R” button next to the track.
- Hit the record button when ready and use the pause or stop buttons to control the session. Audition allows for multitrack recording, which is perfect for podcasts with multiple hosts or guests.
4. Importing Pre-recorded Audio
If you’ve recorded audio externally, you can import it by selecting File > Open > Choose Audio File. For multitrack sessions, ensure your playhead is positioned correctly, then choose Multitrack > Insert Files.
5. Adjusting Audio Levels
Before recording, always monitor and adjust your input levels to avoid clipping or distortion. Make use of Adobe Audition’s Loudness Meter to ensure your audio stays within optimal levels, especially for podcasts consumed in noisy environments.
6. Saving Your Work
Frequently save your session by going to File > Save. If you’re recording a multitrack session, save the session file with all associated clips in one organized folder.
Editing Your Podcast

Adobe Audition is a powerful tool for podcasters who are looking to enhance the quality of their recordings. From trimming unwanted sections to applying advanced effects like noise reduction and equalization, it provides all the necessary tools to refine your podcast to a professional standard.
Whether you’re working with multiple tracks or just a single audio file, Audition’s intuitive interface allows for non-destructive edits, meaning you can experiment without altering the original audio. Moreover, the batch processing and multitrack functionalities make it an efficient choice for podcasters dealing with complex projects.
One of the key advantages of Adobe Audition is its ability to manage various sound elements, from background music to dialogue, while keeping everything organized in a multitrack view.
With features like the Essential Sound Panel, even beginners can apply professional-level sound adjustments such as loudness correction, noise removal, and rumble reduction. After editing, exporting the final product in formats compatible with podcasting platforms ensures a smooth publishing process.
- Non-destructive editing ensures flexibility in experimenting with audio without permanently altering the original file, crucial for iterative edits.
- Essential Sound Panel simplifies applying professional-level sound adjustments like noise reduction, making it accessible for beginners.
- Batch processing saves time by applying edits across multiple clips at once, which is especially useful for podcasts with several segments.
- Multitrack editor helps to manage different elements like background music, dialogue, and effects, ensuring a clean and organized sound mix.
Exporting Your Podcast
To export your podcast in Adobe Audition, follow these steps to ensure optimal audio quality and compatibility with podcast platforms:
1. Exporting as an MP3 or AAC
Once you’re satisfied with your edits, go to File > Export > Multitrack Mixdown to export the entire session, a specific time selection, or selected clips.
For podcast distribution, MP3 is the most widely used format due to its compatibility with most platforms, though AAC files offer better quality at smaller sizes. For stereo podcasts, it’s recommended to use a 128 kbps MP3, and for mono speech-focused podcasts, a 64 kbps MP3 works well.
2. Encoding Settings
When exporting, make sure to select the appropriate sample rate (usually 44100 Hz for podcasts) and bit depth. You can also choose between Adobe Media Encoder for additional output options or keep the process within Audition itself. Use the Loudness Meter to ensure your podcast meets standard loudness levels (-18 LUFS is commonly used for podcasts).
How to Publish Your Podcast
To publish your podcast using Adobe Audition, you first need to ensure that you have finalized your edits and exported your podcast in the appropriate format. Typically, podcasters choose MP3 or AAC formats, with MP3 being the most widely accepted. Once your file is ready, here’s the general process for publishing:
- Choose a Hosting Platform: Use a podcast hosting service like Buzzsprout, PodBean, or Libsyn. These platforms will store your audio files and generate an RSS feed for your podcast, which is essential for submission to podcast directories like Apple Podcasts, Spotify, and Google Podcasts.
- Submit Your RSS Feed to Directories: Once your podcast is hosted and you have your RSS feed, submit it to major directories. Platforms like Apple Podcasts and Spotify have specific requirements, such as ensuring your RSS feed complies with RSS 2.0 standards and your cover image is between 1400×1400 and 3000×3000 pixels.
- Claim Your Podcast: After submission, you should claim your podcast on each directory, giving you access to valuable analytics like listener numbers and downloads.
By following these steps, you’ll ensure your podcast is accessible across all major platforms, reaching a broader audience.
Adobe vs Audacity Comparison

When comparing Adobe Audition and Audacity for podcasting, each has distinct advantages depending on your needs and expertise. Adobe Audition is a professional-level tool with advanced features, making it ideal for those who require multitrack editing, seamless integration with other Adobe Creative Cloud apps, and extensive audio restoration capabilities.
It is subscription-based, which can be a drawback for budget-conscious users, but it offers powerful tools for complex audio projects. On the other hand, Audacity is a free, open-source software that is beginner-friendly and provides basic to intermediate audio editing features. Its simplicity makes it a great option for casual users or those just starting with podcasting.
Both tools have key similarities, such as supporting multitrack editing and offering essential effects like noise reduction. However, Audition’s more advanced options, such as real-time effects and a vast library of over 70 built-in effects, set it apart for professional use.
Meanwhile, Audacity’s straightforward interface and active community support make it accessible for those who don’t need the professional features of Audition.
Comparison Table
| Feature | Adobe Audition | Audacity |
|---|---|---|
| Price | Subscription-based ($20.99/month) | Free |
| Ease of Use | Intermediate to advanced learning curve | Beginner-friendly |
| Multitrack Editing | Extensive support for multiple tracks | Limited multitrack support |
| Effects Library | Over 70 advanced effects, including noise reduction | Basic effects with support for plugins |
| Audio Restoration | Advanced restoration tools | Basic restoration tools |
| Integration | Seamless with Adobe Creative Cloud apps | None |
| Supported Formats | Wide range of formats including video | WAV, MP3, FLAC, AIFF, and more |
| System Resources | Requires more processing power | Lightweight, runs on most systems |
| Community Support | Extensive support from Adobe resources | Active open-source community |
In summary, if you need advanced audio tools and are working on complex podcast projects, Adobe Audition is the superior choice. However, if you’re starting out or need a simple tool without the cost, Audacity is a solid alternative.
FAQs
Can I use Adobe Audition to edit live-streamed podcast audio?
Yes, Adobe Audition supports post-production editing of live-streamed audio. Once you’ve recorded your live stream, you can import the audio file into Audition and use its extensive tools, such as noise reduction and multitrack editing, to clean up the audio and enhance sound quality.
How does Adobe Audition handle podcast loudness standards?
Audition includes a Loudness Meter and Match Loudness tools to ensure your podcast meets standard levels for platforms like Spotify or Apple Podcasts. Most platforms recommend a loudness of -16 LUFS for podcasts, and Audition helps you easily achieve this with its built-in tools.
Is Adobe Audition beginner-friendly for podcasters?
While Adobe Audition offers professional-grade tools, beginners can still use it for podcasting with practice. Adobe provides tutorials, and the software’s multitrack editor and Essential Sound Panel make common tasks, like cleaning up audio and mixing tracks, accessible even to users with basic knowledge.
Does Adobe Audition support third-party plugins?
Yes, Adobe Audition supports VST and AU plugins, allowing podcasters to expand their editing capabilities with external effects or custom audio tools. This flexibility helps improve your audio quality beyond the built-in effects.
Final Thoughts
Adobe Audition is a powerful tool for podcasters, offering advanced editing, multitrack capabilities, and seamless integration with other Adobe apps. While it has a steeper learning curve compared to free alternatives like Audacity, its professional-grade features make it a top choice for those serious about podcast production. Whether you’re a beginner or experienced, mastering Audition will elevate your podcast quality and streamline your workflow.


